How To Make A Jelly Circle Animation

In this tutorial we’ll take a look at creating a cool jelly-like animation of a circle and for this we’ll use a very versatile effect from After Effects, the Turbulent Displace. The technique is very easy to use and you can expand and think of many other creative ways to used it based on this approach.
Here’s how to do it
We’ll create as always a new composition 1920×1080 and we’ll create a new background layer by going to Layer – New – Solid. We’ll choose a dark background color.
 Next, we’ll choose the ellipse tool from the tool panel and draw a circle. You can also press “Q” to cycle between the tools in the tools panel.
 Tip: If you hold down the shift key, it will maintain proportions and draw a perfect circle.
Next, let’s move on to the animation, open up the dropdown menu for the circle layer and go to Contents – Ellipse 1 – Ellipse Path 1.
Tip: If you hold down the shift key, it will maintain proportions and draw a perfect circle.
Next, let’s move on to the animation, open up the dropdown menu for the circle layer and go to Contents – Ellipse 1 – Ellipse Path 1.
 We’ll start with the size set to 0 and set a keyframe by enabling the stopwatch, then we’ll move the cursor in time and set it to a higher value, in this case 470.
 Next, select both keyframes and press F9 to easy ease them.
We are ready now to add the effect, so in the effects panel search for turbulent displace and double click it to apply it to the layer.
Next, select both keyframes and press F9 to easy ease them.
We are ready now to add the effect, so in the effects panel search for turbulent displace and double click it to apply it to the layer.
 Move the cursor to the first keyframe and we’ll set the evolution to 2,
 then we’ll move the cursor towards the end of the animation and set the evolution to 0.
 The animation already looks nice but now we need to animate the “amount” so we’ll set it to 0 in the beginning and then we’ll set it to 89 midway the composition
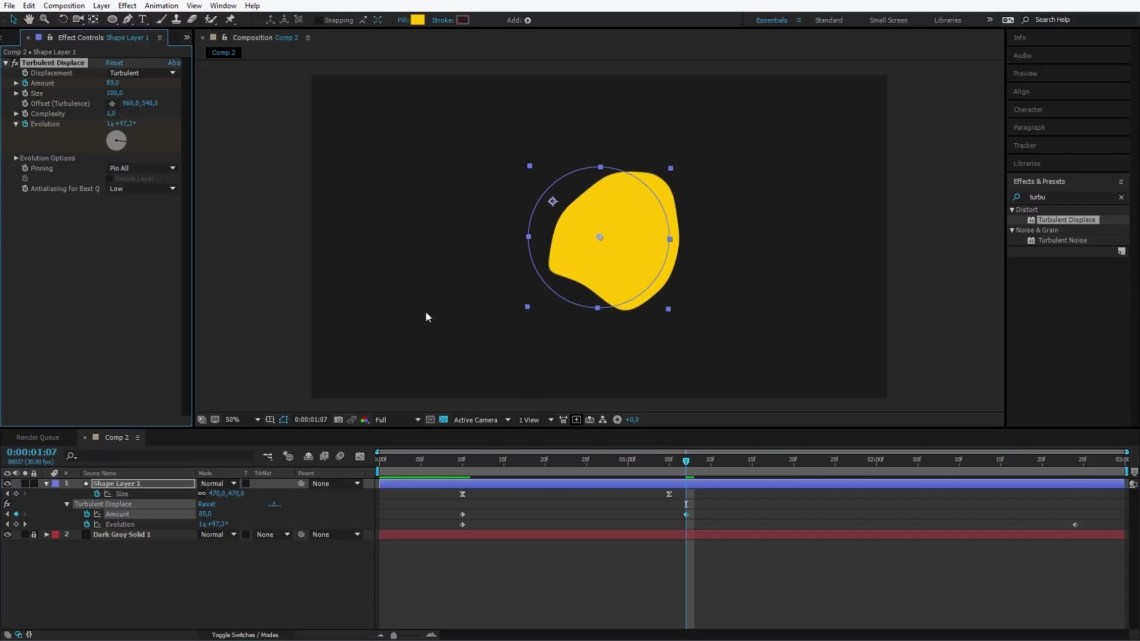 and we’ll also set an intermediate keyframe before the end at 60 value and then 0 at the end of the animation, so we can have a perfect cycle.
 For more advanced users, you can easy ease the keyframes and adjust the bezier handles in the graph editor until you get nice dynamics and fluid movement
How-To-Make-A-Jelly-Circle-Animation-10
Improving the design
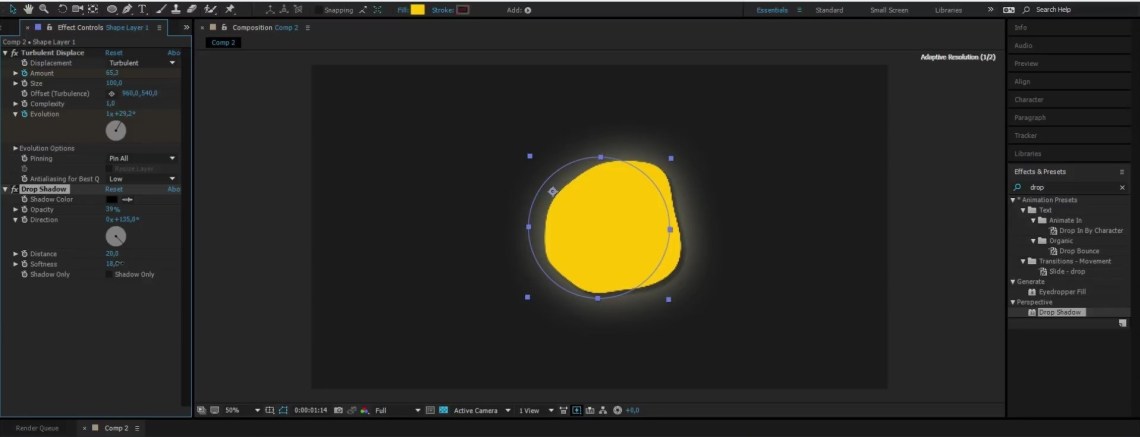
Our animation already looks very cool and we have a nice fluid motion for the circle, but we can add more to it to make it stand out even more, so to do that we’ll select Layer – Layer Styles – Outer Glow.
 We’ll lower down the opacity, adjust the size by increasing it to around 190 and lower the range.
 Finally, we can add a nice drop shadow to our circle animation, so we’ll search for “Drop Shadow” in the effects panel, and add it to the layer
We’ll decrease the opacity, increase the distance and bring up the smoothness a bit
Finally, we can add a nice drop shadow to our circle animation, so we’ll search for “Drop Shadow” in the effects panel, and add it to the layer
We’ll decrease the opacity, increase the distance and bring up the smoothness a bit
 And this wraps up the Jelly Effect technique.
Thank you for taking the time to read this tutorial, please stay tuned for more cool tips and tricks on After Effects and Adobe Premiere coming up soon.
And this wraps up the Jelly Effect technique.
Thank you for taking the time to read this tutorial, please stay tuned for more cool tips and tricks on After Effects and Adobe Premiere coming up soon.