How To Use The Masking Tool In Premiere Pro

The masking tool from Premiere is a very cool and useful feature, but there are some uses you might have actually overlooked, so in this article, we’ll take a look at how to get the most out of this tool
1. Remove objects from scenes
In some situations you might need to have an object or a person removed from a scene, so instead of re-shooting the whole scene, here’s what you can do.
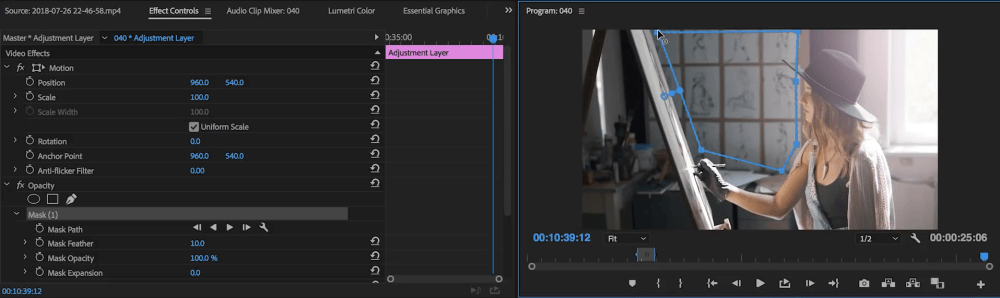
In this example, we’ll remove the person and we’ll start by drawing a mask around the subject. Choose the mask under opacity and isolate the subject.
 Next, we need to keyframe the mask path so it follows the subject, so to do that click on the stopwatch next to the mask path property
 then move the playhead to the end and adjust the position of the mask accordingly. This will automatically create a new keyframe.
 Next, we’ll need to feather the mask and, if necessary, expand the mask.
 Finally, select the Invert option and this will display everything from the scene, except out subject
 Next, we’ll duplicate the video track and place it on top, and then delete the mask for the bottom layer.
 The next step is to move the bottom layer to a place in time where it doesn’t show the subject.
To do this, select the slip tool by pressing “Y”, then move your bottom clip forward or backward.
The next step is to move the bottom layer to a place in time where it doesn’t show the subject.
To do this, select the slip tool by pressing “Y”, then move your bottom clip forward or backward.
 If you can’t move the clip, you can fix that by cutting off a bit from the beginning and the ending of the clip.
2. How to isolate light and color in a scene
Some parts of a scene can be either overexposed or underexposed so let’s take a look at how to fix that
Right click in the project window and create a new adjustment layer
 Place it on top of your clip and then select the pen tool under the Opacity property and draw a mask around the area you are looking to control
 Feather the mask
Next, go to the Lumetri Color panel and ajust the color setting to your liking.
Feather the mask
Next, go to the Lumetri Color panel and ajust the color setting to your liking.

3. How to give depth to your text
You can add depth to text and make it look like it’s actually part of a scene so let’s see to achieve this effect
In this example, we have a text that we’re looking to have erased as the subject is passing throught the scene.
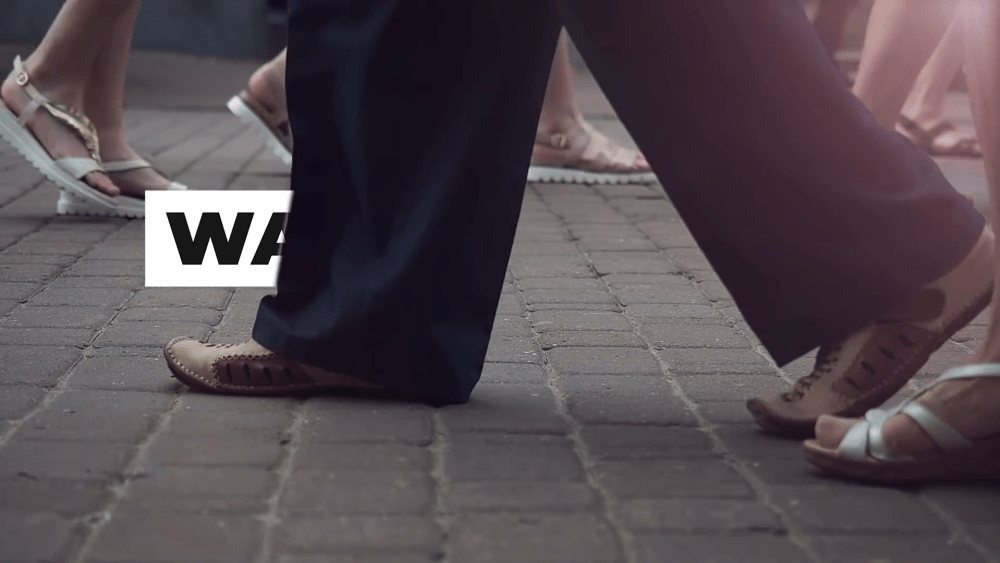 We’ll add a simple mask and keyframe the mask path according to the movement, giving the impression that the text is “erased”
 Optionally, you can add a bit of feather to improve the scene even further
4. Making faces stand out in a scene
This technique is similar to the one we’ve described in technique #2 but this time we’ll place and oval mask.
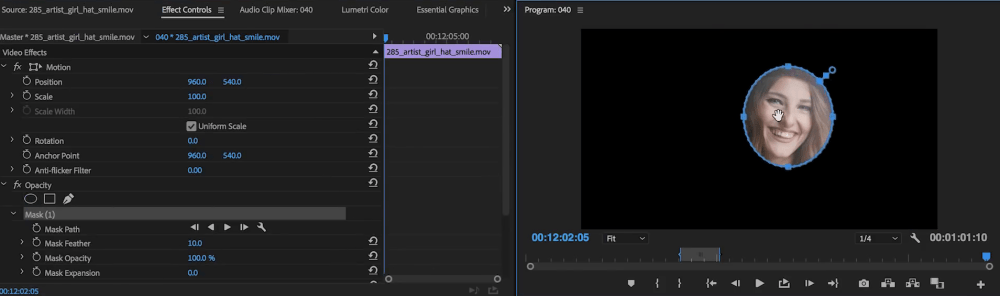 and press the forward button in the mask path section, to start tracking the face.
 The face tracking feature is really good in Premiere Pro
We can now duplicate the layer and delete the mask on the bottom layer,
The face tracking feature is really good in Premiere Pro
We can now duplicate the layer and delete the mask on the bottom layer,
 and head over to the Lumetri Color Section of applying any desired color correction to the mask we’ve just created.
 Remember to add feather to the mask so that it blends evenly with the background
You can even take this technique a step further and track individual parts of the face, such as the eyes and bring them up a bit by increasing the exposure. This will make a big difference in the final result.
Remember to add feather to the mask so that it blends evenly with the background
You can even take this technique a step further and track individual parts of the face, such as the eyes and bring them up a bit by increasing the exposure. This will make a big difference in the final result.
 Thank you for taking the time to read this article and stay tuned for more cool tutorials and tips for.