Overlooked Premiere Pro Effects You Didn’t Know About

Adobe Premiere is a fantastic editing tool and most users rely on its basic editing functionalities and post-production features. However, there are some cool effects hidden inside the dashboard that you probably didn’t even know existed so in this article we’ll take a look at 4 fewer know effects inside Premiere Pro
1. Basic 3D
When it comes to 3D editing, most users will turn to After Effects but Premier Pro has it’s 3D plugin built in as well and it’s very suitable for quick 3D animation, such as logo reveals. The Effects lays in the Effect Panel – Video Effects – Perspective – Basic 3D
 To use it, simply search for it in the Effect Panel and drop it onto your video element.
The main controls are “Swivel” and “Tilt” to make your object look like a 3D one
To use it, simply search for it in the Effect Panel and drop it onto your video element.
The main controls are “Swivel” and “Tilt” to make your object look like a 3D one
 Using this technique you can build your own custom transitions or animate your logo.
 For this example, we’re going to offset the swivel property, keyframe it and then move the time indicator forward and bring the swivel to its original 0 value
 and then move the time indicator forward and bring the swivel to its original 0 value
For a final touch, you can also check “show specular highlight”, which will display a fake light source on the object. The highlight is dynamic and it will move in correlation with the 3D movement of the object
and then move the time indicator forward and bring the swivel to its original 0 value
For a final touch, you can also check “show specular highlight”, which will display a fake light source on the object. The highlight is dynamic and it will move in correlation with the 3D movement of the object
 So this is a great way to create a quick intro without having to go to After Effects.
2. Ramp
A ramp is basically a gradient and it enables you to make your backdrop look more complex and fine-tuning.
The effect is located under the “Video Effects – Generate” section, and once located just drop it onto the background track
 The choices in terms of shape are “linear” and “radial ramp”
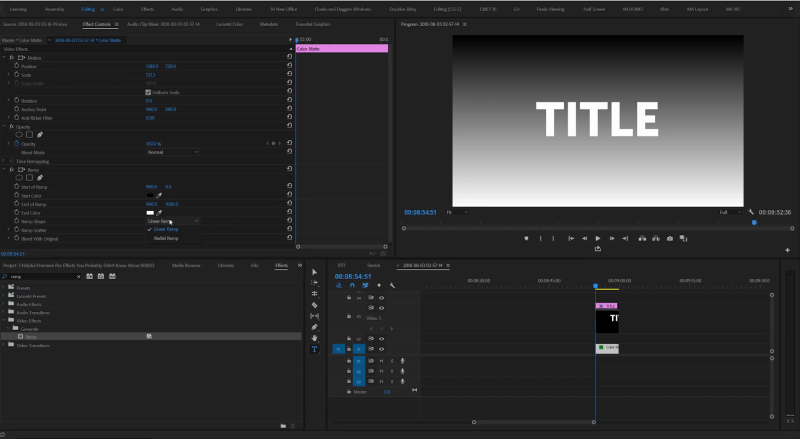 The key is to select 2 colors that are different but very close to each other, to create a subtle effect.

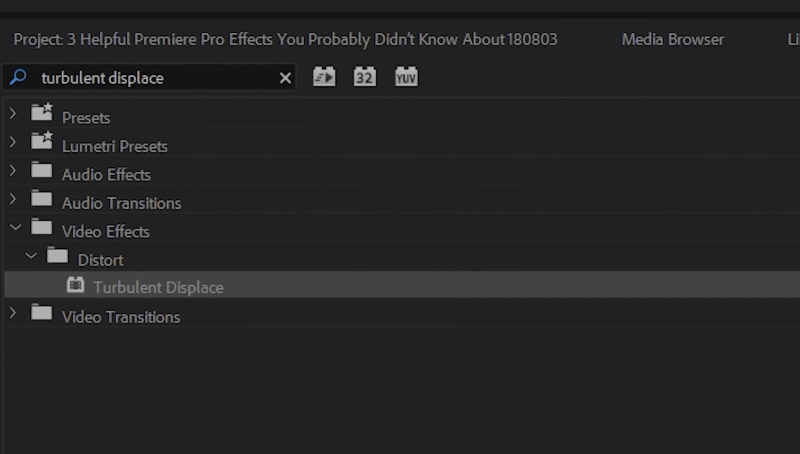
3. Turbulent Displace
The turbulent displace effect looks complicated and with intricate controls, but in reality, it’s very easy to set up and use
The effect is located under the “Distort” section in the Effects Panel and it allows you to add distortion to your footage.
 A great use for this effect is to create custom transitions and here’s how to do it:
- add the effect on a text layer

- set all the properties to 0 and keyframe each
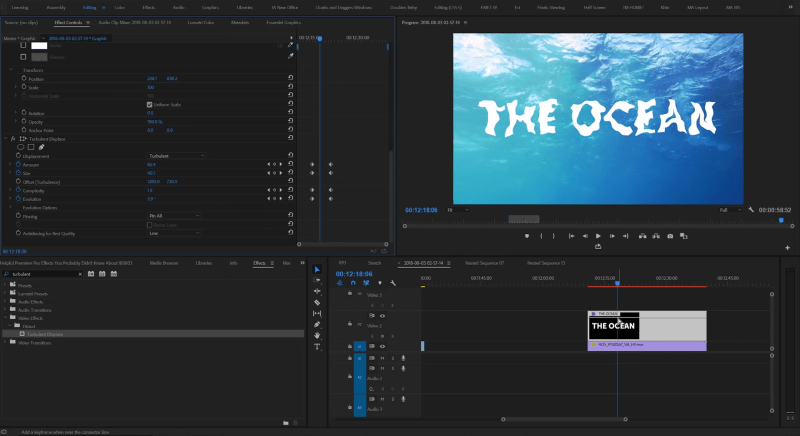
- move the player forward and change the “amount”, the “size”, the “complexity” and the “evolution” until you get an image you like

- lastly, we’ll keyframe the opacity and our animation is done
This effect can also be used to create the scribble effect on handwritten elements or texts. It works great with the whiteboard animation type of presentations.
4. Lens Distortion
Particular footage such as footage show with a drone camera might have a fish eye look which is not something many people want to see in the final video, so to fix that Premiere has a special plugin for that called “Lens Distortion”
 The effect is located in the Presets section and you can remove the fisheye effect by location the model of the camera you have used for taking the shot
Next, just apply it to the video clip.
You can also make manual changes to the effect and control properties such as the “curvature” values and fine tune everything manually.
The effect is located in the Presets section and you can remove the fisheye effect by location the model of the camera you have used for taking the shot
Next, just apply it to the video clip.
You can also make manual changes to the effect and control properties such as the “curvature” values and fine tune everything manually.
 The effect can also be used manually under the “Distort – Lens Distortion” section, but everything has to be configured by hand
 So these are hidden effects in Premiere Pro, thanks for reading this article and stay tuned for more new tutorials coming soon